Showing posts with label tim holtz. Show all posts

Tuesday, 17 March 2015

A Mixed Media Layout

Heyyyaaa Lovelyyy Crafter Friendssss!! <3
I know, I have changed the look of my blog...did you like it? I am totally happy with it!

Well, I was excited creating my mixed media layout the first time inspired by Mr.Jack Sparrow.
I knew it then, I had to make more of them! ;)

So, I came up with another layout. This time inspired by International Women's Day which was celebrated on 8th of March! I created a 12 *12 inches layout on canvas. I have used the blue hues in this Shabby Chic layout.

Sneak peeks of my layout before showing you the full image! ;)


Firstly, I layered the canvas with Loads of floral patterned papers from Paper Mania. I cut out the edges from a few areas and adhered a crochet lace which seeks out from the torn parts ;)


I primed these papers using Mod Podge Matte finish, White Acrylic  Color and White Fabric color. The layout was spritzed with water after all this was done so that the papers got really wet! I dried them and primed with another layer of Mod Podge. 

I adhered more patterned papers, laces and a corner wooden embellishment to the layout. I colored Prussian Blue acrylic color over the layout and let it dry. I brought Texture Paste(Ranger) recently and loving it totally!! This is the new technique that I am using and it's an amazing product.I have used Crafter's Workshop Stencils with Texture paste and let it dry overnight.

I used Bo Buuny Stamp set and Kaiser Craft Flutter Stamp Set along with Tim Holtz-Distress ink (Black Soot) over the layout.

I adhered buttons and flowers and arranged them. I layered them over with white pearl color and blue color to give them a glittery look. I added a few brads here and there and a few pearl embellishment. This gives your layout a girly look! :)

I printed out a few sentiments and cut them out. I added the sentiments to the layout and the beautiful picture over the space.


Here is the layout! I am dedicating this to the women all around the world who are proud of their women hood and want to celebrate it! Here is my post for the same. 

Tell me how do you find it?

I am entering this layout for the below challenges:

1. Create Something Catchy # 12  which ends on 31/3
I am inspired strongly by this gorgeous picture. I have used the colors- black, white and blue. I have used this image in my layout.


2.Inkspirational Challenge # 78 she art or image of a women which ends on 27/3

3.Beyond Grey Challenges # 66 -Mixed Media which ends on 31/3


Monday, 16 March 2015

Guest performance at NJC blog! :)

Namaste Dear Bloggersss!! _/|\_

Not Just Cards has offered me to be their Guest Designer this month too! I am honored!
So, I decided to decorate a paper bag that I had with me!


I have used Digital Stamps and Sentiment from  Stitchy Bears -"Stitchy Bears_Digi Blessings - Baked With Love" with you can find here. I loved this cute bear and the innocence on its face! Its so pretty! :) :)

I sponged the Worn lipstick and Fire brick Distress ink over the background using a stencil. I textured the bag using Salty ocean distress ink and Bo-Bunny "To the Point" Stamp Set. I also used the same set and stamped those directions using Black Soot. I colored the Digi using distress ink.

I adhered a Musical print sheet at the bottom and embellished a wooden camera  near the bear! I adhered a lace which has a bear already and also bordered the digis using Black Pigma Marker. I hand - drew these little musical notes and Salt/Sugar/Honey bottles using white and black gel pens. I was done then! :)

I am entering it for the following challenges:

1. Altered Eclectics March Challenge which ends on 31/3
2. Craft My Life March which ends on 31/3

Friday, 13 March 2015

A Mixed Media Spring Card

Namaste Dear Crafters!!

I have created a mixed media card with a hint of spring to it! Here is my card...


I have distressed the background using different Tim Holtz inks- Mowed lawn, seedless Preserves, Fire Brick, Wild Honey, Salty Ocean, Old Paper, Weathered Wood and Worn Lipstick.I textured it using white gel pen and black pigma marker with stencils. I loved those Bird Digis sitting on the wire. The silhouette is so romantic and gives shades of spring! :)

I adhered it on a black card stock which I then adhered on the main background using double sided foam tape. The musical back ground is created using Versamark and heat embossing over it. I colored it using water color. I added those circles using black marker and added a few embellishments.

I stamped the sentiment using BoBunny Sentiments Stamp Set and Black Soot Distress ink. 

Did you guys like this spring card? :)

I am entering this card for :
1.Mixed Media Challenge # 9 which ends on 25/3 -Hint of Spring

2.Verve Stamps which ends on 19/3 - A Birthday Card

3.Mixed Media Monthy Challenge # 10 ends on 31/3- Birds of a feather

4. Lulupu Birthday Bash Card ends on 31/3 -I am inspired by the colors form the moodboard.
Technique -distressing, embossing
Material -paper, versamark, double sided adhesive tape
Embellishments- sequins, glitter 
Shape-rectangle, circle
All other things- Twig, colors
I have used 3 layers of card, 3 sequins, 3 stencils circles.


Monday, 19 January 2015

Birthday Card!

Heyyaaaaa my inspiring friends!!!

I have created this CAS card. All you need is some ink and a pen!
This card took me hardly 5 mins....I am so happy to have created this simple yet colourful card!

Count 1....2....3...!! And the Card is ready! :)


Sunday, 18 January 2015

Thank you Card!

Hellooooo Crafter!!!

Here is another Thank you card from me! I haven't used any stamps for it!
I have used salty ocean, mowed lawn and seedless preserves distress ink. I used a few star, music and celebration stencils for the same. I have hand-written the sentiment. The card is easy and quick! :)

I am entering it in:
http://unstampabelleschallenges.blogspot.in/ -done
http://casethissketch.blogspot.in/ -done
http://inkspirationalchallenges.blogspot.co.uk/-done

You Rock My World!

Hello My Awesomely Inspiring Friendssssss!!!

I have come up with another CAS card ! I have used strong colors - fire brick, mowed lawn, salty ocean and wild honey distress ink. :)

I added the musical notes and a guitar using a stencil. I hand-wrote the sentiment with a Black Point Pen.
It is a quick card. It took me hardly 10mins to complete this card.. :)


I am entering this card into the following challenges:
http://casethissketch.blogspot.in/ -done
http://www.addictedtocas.blogspot.com.au/ -done
http://speedcraftchallenge.blogspot.in/ -done top 3
http://toptiptuesday.blogspot.it/ -done

Friday, 16 January 2015

A Teddy Bear Shaker Card!

Hello Crafters!!

I have created a Teddy Bear Shaker card! Teddy bears are really cute and can melt your heart if someone gifts you a teddy card! My hubby and I had a little fight..so I decided to give him a card! He loved it! <3 :D

So, here is the card!

I have used a Red, Pink and White theme. I am using heart as my inspiration here (Muse celebration)..

I have added a teddy bear Connie Stamp and fussy cut it. I have used a red fabric color to fill in the heart. It gives your card a three dimensional look.

I have stamped the inside of the shaker card with Love stamp using seedless preserves distress ink! I am really loving the effect! :)
I added these little sequins and stuck the circle using 2 sided glue tape. I added the sentiment and cut out a pink heart and bordered it using the red fabric color. I used the heart stencil and fire brick distress ink to border the card with hearts! :D

I am entering them into the below challenges:
http://www.addalittledazzle.com/dazzling-diva-challenge-58/ -done
http://www.hidinginmycraftroom.com/-done
http://stampedblessings.com/ -done


Monday, 12 January 2015

Twist of Music CAS!

Helloo Everyone!!
I have created another CAS card with the twist of music to it!
I have created a tag using seedless preserves distress ink and music stencil. Then I added a musical notes strip and coloured it with the old paper distress ink. I stamped the sentiments in colour wrote the black part. I created this card very quicky! It took me hardly 15mins :)


Entering for the challenges:

http://speedcraftchallenge.blogspot.in/ -top 3
http://addicted-to-stamps-challenge.blogspot.in/ -done

Thank You Card!

Hello Crafters!!

I have created a quick CAS card! I have used "wild honey"distress ink and water for the background. I have used mowed lawn distress ink for the sentiment-"Thank You".
I colored the card light brown using water colors. I stuck a few sequins and was done!
This card took me hardly 15mins. I have used just 1 set of stamps- Alphabet clear stamp!
I got my inspiration from our very own Catchy Designs Lovely Lady Deepti Stephens.

I am entering this card for the following challenges:

http://www.blog.winniewalter.com/2015/01/w-1st-birthday-bash-one-challenge-with.html
http://www.cardchallenges.com/search/label/sketchchallenge
http://thepaperplayers.blogspot.in/

Tuesday, 6 January 2015

No Stamping Patch Work Tag!

Hey bloggers!!
Here is a tag that I present to you without using Stamps(Digi , Rubber or Clear)! This is quite challenging after you are smitten by stamping!
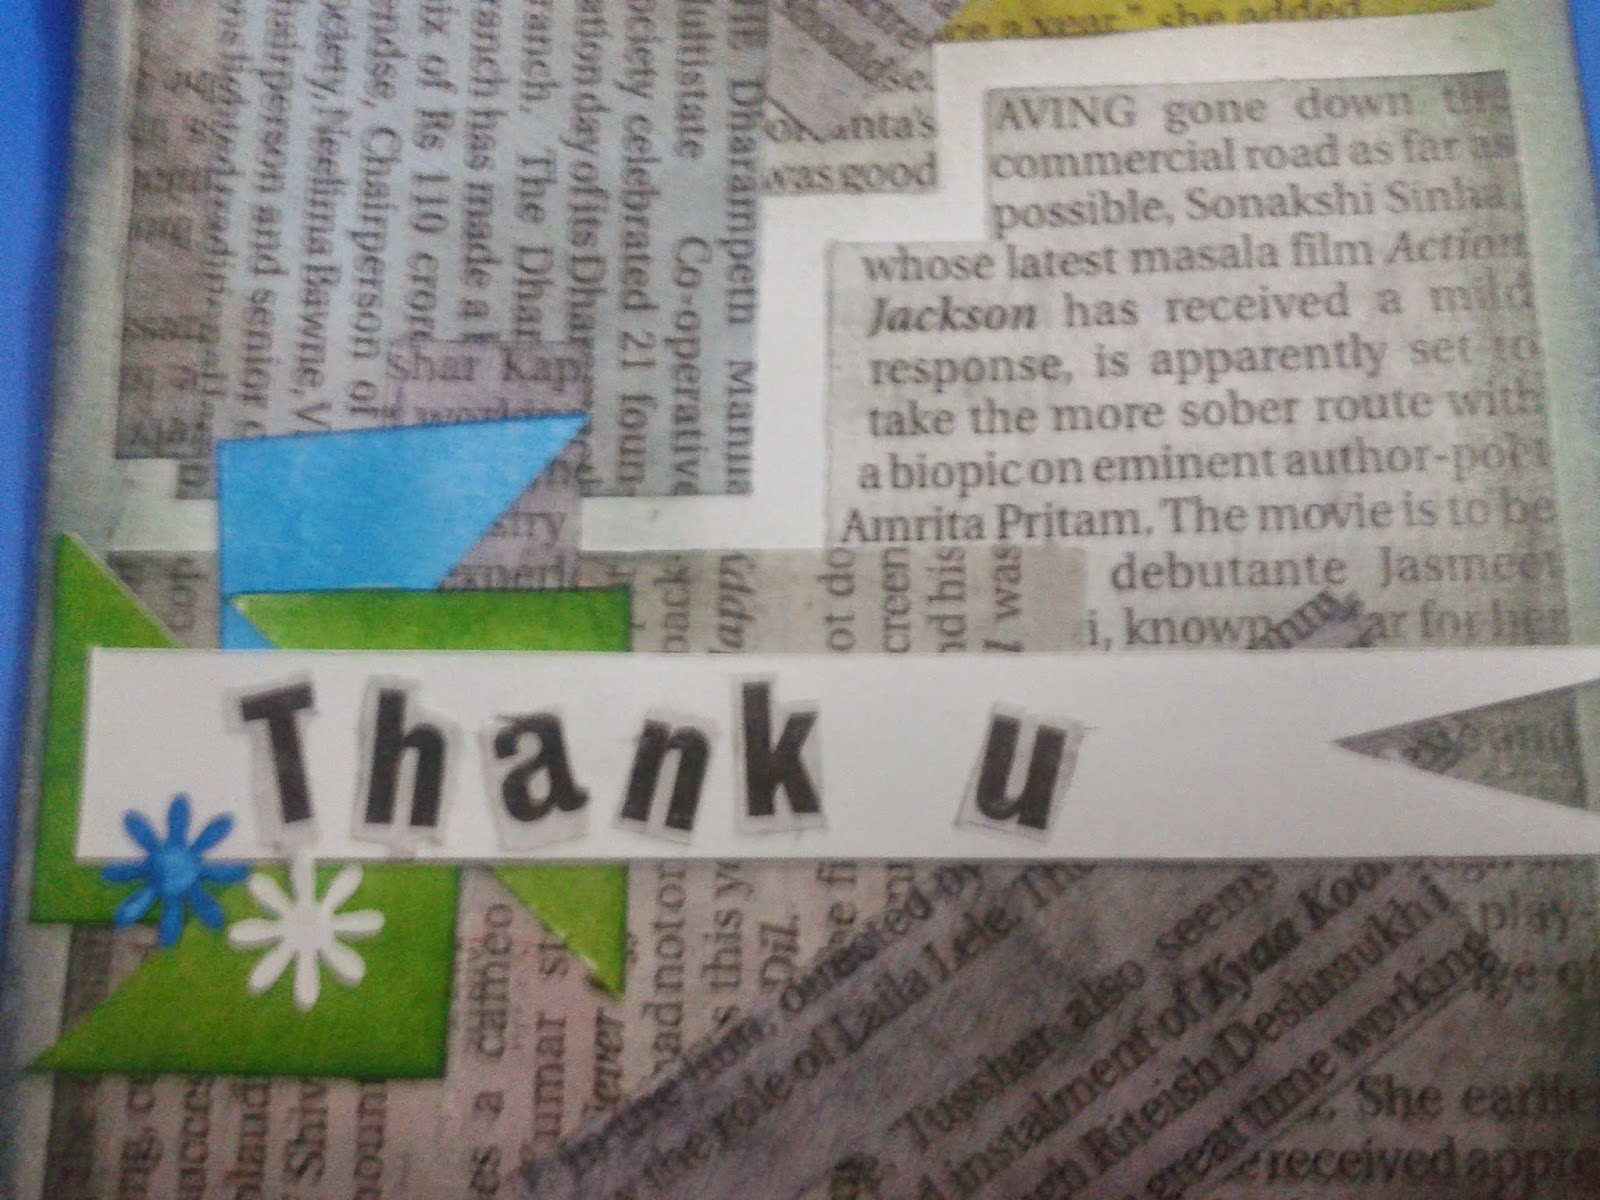
So, here is a tag where I have used "Patch Work". We all have useless newspapers with us. So, I decided to make some use of it. I made patch work out of it and I have distressed it with "Old Paper" and "Weathered wood"  ..It gives your tag a "Muddy" look! :D

I have added the Thank you sentiment(not by using stamps) but I cut out the fonts from the newspaper and decided to use it!  I embellished the tag using mowed lawn and Salty Ocean triangles and decorated using flower punch.

Here you go now, the "Thank You"tag is ready! :)


I have used the below materials:
1.Newspapers
2.Distressed ink-old paper/mowed lawn/salty ocean and Weathered wood.
3.Flower punch

I am entering them into the below challenges:
http://cutedaisymay.blogspot.in/
http://craftingfromtheheartchallengeblog.blogspot.in/
http://thepaperplayers.blogspot.in/

Saturday, 3 January 2015

Tag Table Calender..!!

Hello Bloggers!! :)
A very Happy New Year 2015 to you all!! Me and my husband decided to start with a new year project. He loves photography so he would be making a calender using Photos. And this got me thinking! So, here I am presenting before you a new year project - A Tag Table Calender!! :D


I am getting addicted to distressed ink! Wow!  I said it loud now! :DThis calender idea is something new to me and I am enjoying it ! It is also a CAS idea. :) I am not so comfortable making stands, so I tried this for the first time.
I started making these tags first. I created 12(January to December) + 4(0 to 3)+ 10(0 to 9)+ 3 Transparent paper tags. In total 29 Tags for this calender!!

So, I started with the 12 tags (dimensions are 2.5inches* 5 inches) from January to December
For this, I have used Tim Holtz Kit 2.
(
Kit #2
SwatchSwatchSwatchSwatch
Fired BrickMowed LawnSalty OceanSeedless Preserves
)

I used all the four colors to make it look colorful. The distressed ink gives your paper a very beautiful look!!

Then i decided to merge all the four colours on one tag paper for the number tags(0 to 9 and 0 to 3).
So, here is how i blended them on all four corners.
And they are ready!!

 So, now we have 12 tags for the months and 14 tags for the numbers of the month ready with us!
For Stamping, I used the Clear Stamps Alphabets. I stamped all the months of the calender on the 12 tags that I created. Here is a look at it..
And more pics..

I added the digits using stencils and seedless preserves distressed ink.

I used these cute star clamps to hang the tags on the stand..We can also use hooks instead of the clamps. However, clamps make it easy! :)
 Now, for the stand, I began by using a card board and cutting it into dimensions greater than the three tags combined.
I covered the stand with brick patterned paper. I have utilized the corners of cut tags by decorating them at the bottom!! :)
I also used a strip combining all the four colors and stuck it at the bottom on the stand for decoration.
The stand is erected using  cardboard strip at the back side of the board.

Here is another look at the Tag Calender!
The best thing about it is, it can be easily customized!! I have added 3 transparent tags in front of these tags in order to increase its life. :)
I am thinking of adding days tag to it too! we can add year tags too!! We can customize this calender and change the theme/colors of it easily!

I am happy to begin this year with my calender project! You can flaunt this calender in your office cubical or your study table at home! :)

The material I have used is:
1. Tim Holtz Distressed Ink Kit # 2
2. Alphabet Clear Rubber Stamps
3. Number stencil
4. Card Sheets
5. Brick patterned paper for stand
6. Tim Holtz Ink Applicator
7. Star Clamps
8. Cardboard
9.Cutting mat/ cutter/scale

I have entered this into a lot many challenges:
http://anythingbutacard.blogspot.in/ -ends on 25/1 
http://thatcraftplaceblog.blogspot.co.at/2014/12/new-challenge-anything-goes.html --didnt get post yet